Saturday, April 14, 2012

SPICE CAKE WITH PEANUT BUTTERCREAM

The fusion of this delicate spice genoise combined with this Peanut Buttercream may seem peculiar at first, but the delicate flavor of this cake lends a soft crumb, & a delightful tone that is different from any other spice cake I've ever witnessed.  This cake can be counted on to only improve in flavor the next day.

With the pan prepared, including parchment, the rack placed in the lower third of the preheated oven, as per 'HC''s instructions, I was ready to go. 


Similar to the "Chocolate Velvet Fudge Cake", I whisked the eggs with some buttermilk, the vanilla & the eggs.  It stopped just short of frothing, perhaps due to the yolk's & the buttermilk.  In my stand mixer I mixed the dry ingredients, on low speed, then added the butter & remaining buttermilk, just until the dry ingredients were moistened.  Then to add structure the speed was increased to medium, for a minute & a half.


Scraping down the sides I used more care to include all of the ingredients.  Then, using attention to the details I added the egg mixture in two batches, at med-low speed.  Then gradually increasing the speed to medium, which absorb's all of the ingredients & strengthens the structure. 


Pouring the batter into the prepared pan, & smoothed the top of the batter I realized this has to be the most uncomplicated cakes I'd made in awhile.  But, It's not done, so I hold my tongue, and wish for as easy an ending, as the begining was. 

I checked it at 30, & 35 minutes, but didn't feel it was done until 36 minutes.  I followed the directions regarding cooling to a T, later transferring it to a serving plate.  I noted a bit later that it seemed to have shrunken in the center just the tinest bit.  Wondering if I was losing my skills, I said a quick prayer. 


I'd never made a buttercream in a food processor before, & with simply measuring the ingredients, per the scale method, it honestly took longer to attach the lid to the processor, than to weigh & insert the ingredients in the container.


I only frosted the top, as done in "RHC"'s, but I couldn't help licking the spatula.  Happy Baking, jo


Friday, April 13, 2012

Chocolate Velvet Fudge Cake

I lay everything I'd need for my recipe (mise en place), with my sugar & flour sifted immediately to save time. I'd looked forward to this cake as it seemed easy, & my daughter had been having a 'chocolate craving' for days.  Two birds with one stone, & I was ready to bake.


The instructions were to whisk the alkalized cocoa & boiling water until it was smooth.  It was actually very thick, but I covered it as instructed, & allowed it to cool in my refrigerator until it was about room temperature.


In an other bowl I  whisked the egg whites, with water & the required vanilla until just frothy.


In the bowl of my standmixer I combined the flour, sugar, baking powder, & salt.  I don't have the flat beater, so I whisked it a bit with the standard whisk, scraping down the sides to be assured that the dry ingredients were mixed. I mixed it for about 1/2 a minute, then added the butter a Tbsp. at a time, then the cocoa mixture, on low speed as instructed, just until the dry ingredients were moistened.  Raising the speed, & scraping down the sides of the bowl, as instructed it was still thick as seen here.


Making an error, I added the egg mixture in 3 batches, instead of the instructed 2, beating on medium speed for at least 30 seconds after each addition, scraping down the sides of the bowl, as instructed.  It states it will strengthen the cake, & I've learned to not doubt Ms. Beranbaum.  My silicone spatula is narrow, & didn't do as good a job as I'd like.  (Adding new spatulas to my shopping list!)


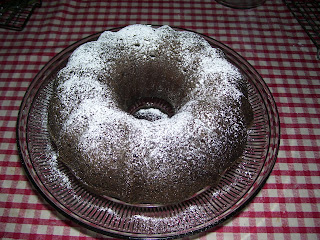
I scraped the batter into my prepared bundt pan & ran my spatula around the top to be certain that the batter was level.  My oven had been preheated & I moved the rack one step lower so that the cake would be in the middle of the oven.  The cake was done exactly at 50 minutes, as predicted in a metal pan.  I'd cooled the cake, then placed it on a cake stand with a matching dome, sprinkling a bit of confectioner's sugar on top of the cake, just for appearances sake. 


It's difficult to see in this last photograph, but the crumb was increadibly tender, and the cake was moist as had been promised.  It is not too sweet, & has a lovely chocolate-fudge taste.  What is it about Velvet cakes that keeps me drawn to them!  My daughter's chocolate craving was gone, to say the least!  Great baking everyone!  jo


Thursday, March 8, 2012

Mise en place

Early in my baking life I learned a process that I later discovered as 'Mise en place'.  It became one of the most important things I've learned, & it's spilled over into other areas of my life as well.  Mise en place is a french term, pronounced 'MEEZ ahn plahs', which literally translates to "put in place".  It was applied to professional kitchens around the time of Georges Auguste Escoffier (1846 - 1935).  He is legendary for elevating the status of cooking to a respected profession.  Escoffier's approach to kitchen management remains influential, even today, worldwide.  The 'Culinary Institute of America' defines mise en place as "everything in place".  It is a state of mind, as well as a culinary technique.  When used it allows a baker/cook to produce in a more smooth flowing, time-saving process, which allows as much enjoyment as possible.  I offer these steps, along with mise en place as a way of allowing your baking experience to produce as much pleasure as possible.
1-  Prepare your workspace starting with a clean kitchen, & empty dishwasher.  Remove any unnecessary items off countertops, allowing maximum work-space.
2-  Read your recipe, being certain to have sufficient ingredients & proper necessary equipment. 
3-  Wash ingredients, chopping them or preparing them in any necessary manner.  Measure & place each item in an individual container.  (Have a tray available to move things as necessary , to a table or any other area, as required.)  Preheat ovens.
4-  Clean as you go.  (This may be the most important, helpful part of the process.)
Happy Baking!

Tuesday, January 31, 2012

Aricca's Skillet Cake

1 1/2 c. AP flour                                            6 T veg. oil      
3 T. cocoa powder                                        1 T. vinegar
1 c. sugar                                                       1 T. vanilla ext.
1 tsp baking soda                                           1 c. cold water
1 tsp salt

Preheat oven to 350F.
Sift the dry ingredients together into a 10" cast iron skillet (also works in 8" baking pan).  Make 3 wells in the dry ingredients.  Pour the veg. oil in the 1st well, vinegar in the second well, & vanilla in the 3rd well.  Pour cold water over the top & stir with a fork until well blended.  Bake for 25 min., let cool, then frost.

Frosting:

1 1/2 c conf. sugar                                         2 T. brewed coffee
2 T. cocoa powder                                         Dash salt
3 T. butter, softened

Cream together sugar, cocoa, butter, & salt, until well blended.  Add the coffee & mix well.  Spread over the cooled cake.
(From Penzey's spice www. site)